Skip to content

Product and collection pages

Your theme

Open a product page and a collection page in the theme editor. Then change the layout, the sticky bar, filters and sorting.

  1. Open the theme editor. See Add your theme to your store if you are not sure how.
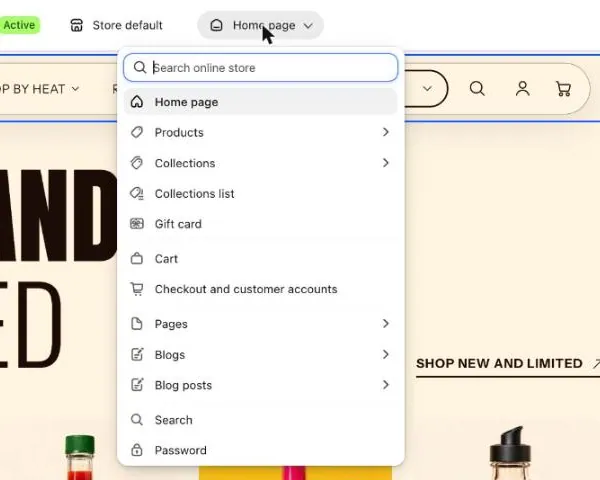
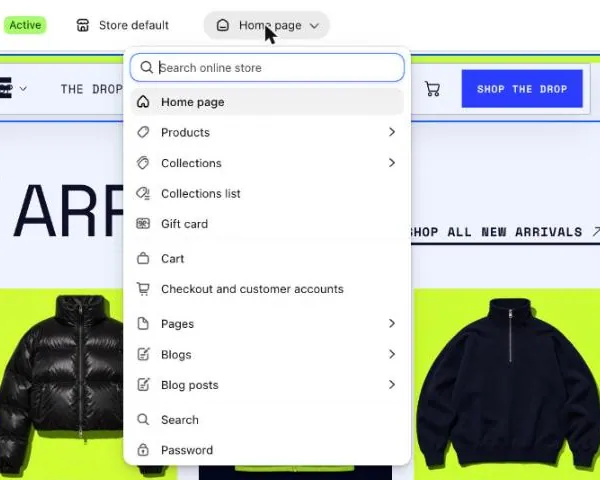
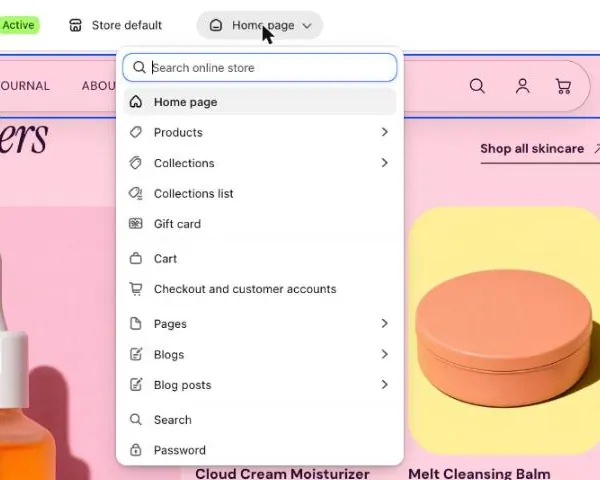
  2. Select the page picker at the top (marker 1).
  3. Select Products (marker 2).
The page picker menu at the top of the editor. Marker 1 is the picker button. Marker 2 is the list of page types: Home page, Products, Collections, Cart, Pages, Blogs and more.
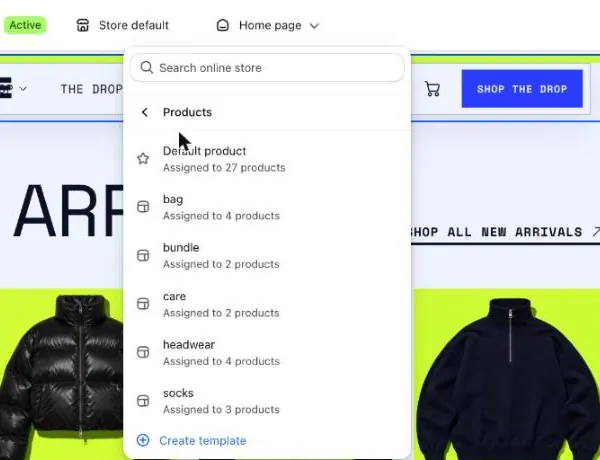
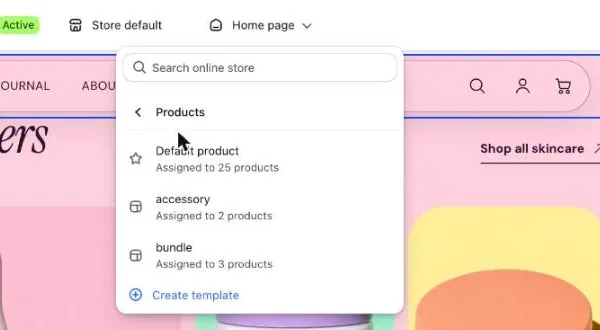
  1. Select Default product (marker 1). Your store may show more templates (marker 2). A template is a saved layout for product pages.
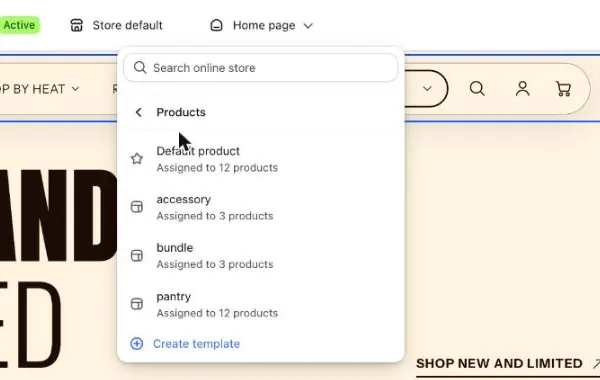
The list of product templates in the page picker. Marker 1 is the Default product template. Marker 2 is the other product templates: accessory, bundle and pantry. Marker 3 is Create template.
The list of product templates in the page picker. Marker 1 is the Default product template. Marker 2 is the other product templates: bag, bundle, care, headwear and socks. Marker 3 is Create template.
The list of product templates in the page picker. Marker 1 is the Default product template. Marker 2 is the other product templates: accessory and bundle. Marker 3 is Create template.
  1. Select the pencil icon next to Preview in the left panel to see a different product.
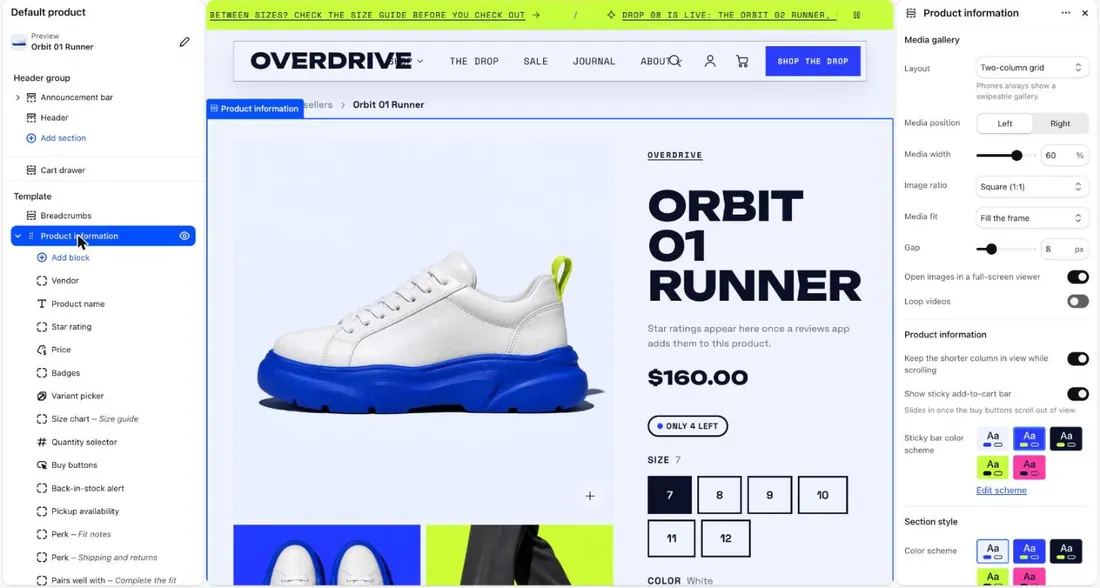
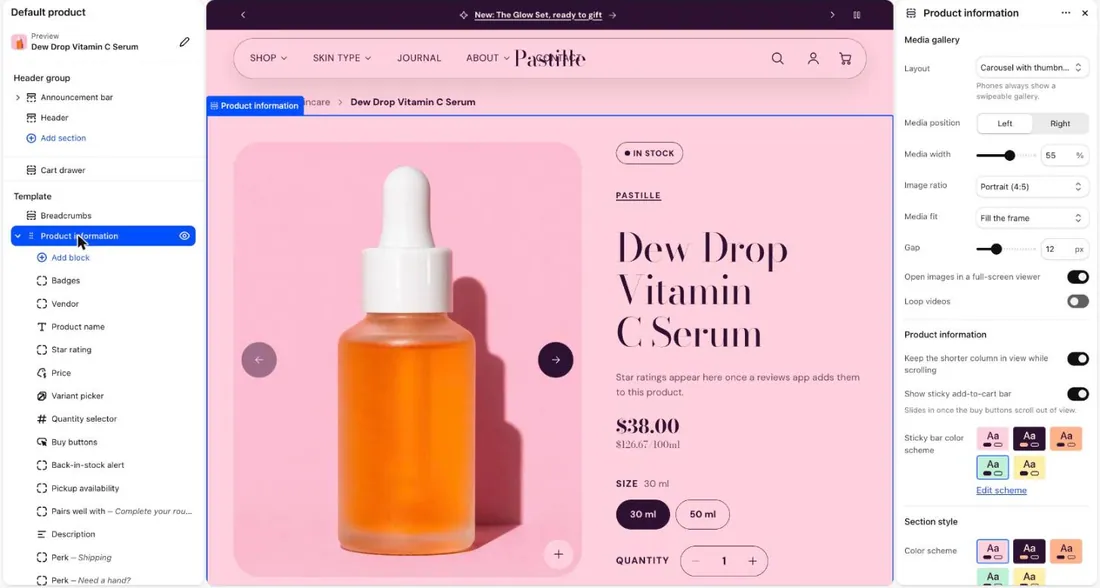
  1. Select Product information (marker 1) in the left panel.
  2. Under Media gallery, open Layout (marker 4). Choose Two-column grid, Carousel with thumbnails or Stacked.
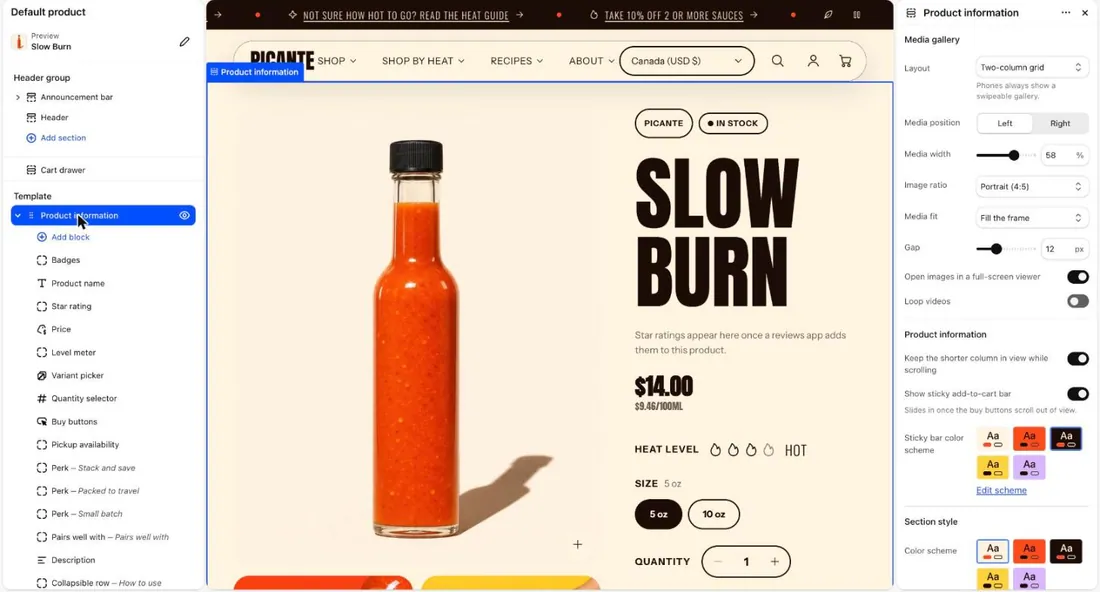
The Product information section on the product page. Marker 1 is the section in the list. Marker 2 is its blocks, such as Price, Variant picker and Buy buttons. Marker 3 is the sticky add to cart bar switch. Marker 4 is the media gallery layout.
  1. Drag a block (marker 2) up or down to move it. Blocks are the parts of the page, such as Price and Buy buttons.
  2. Switch Show sticky add-to-cart bar on or off (marker 3). This small bar slides in when the Buy buttons scroll out of view.
  3. Select Save.
  1. Select the page picker, then Collections.
  2. Choose a collection template, such as Default collection.
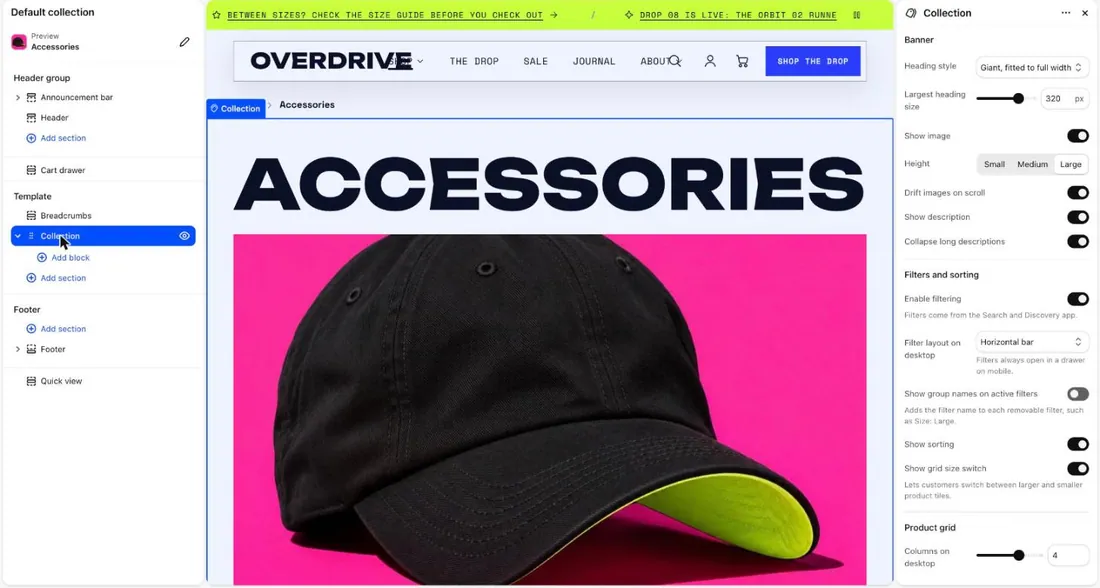
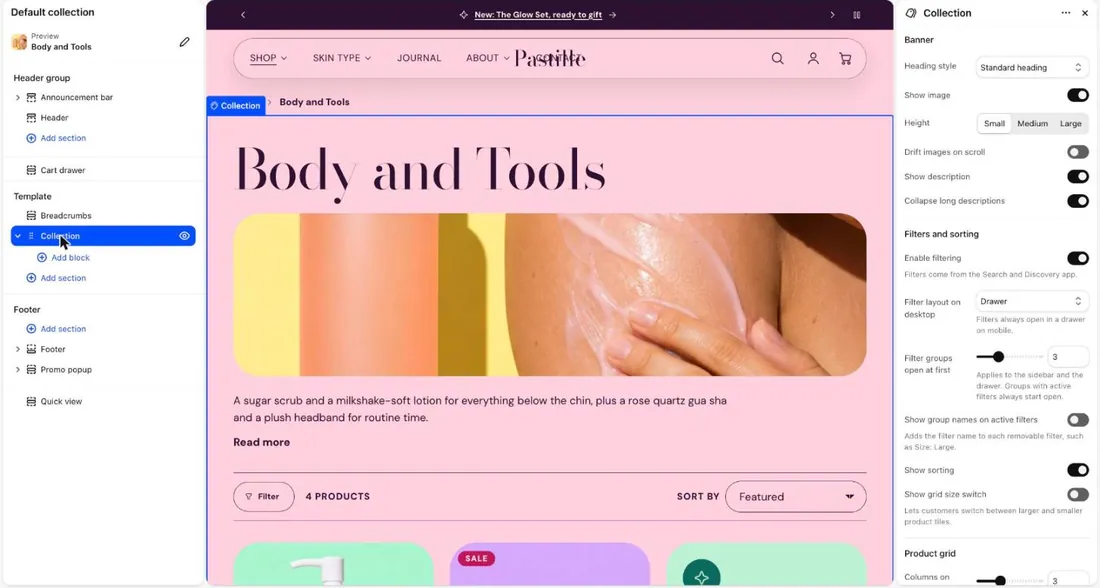
  3. Select Collection (marker 1) in the left panel.
  4. Under Banner (marker 2), switch Show image on or off. Then pick a Height.
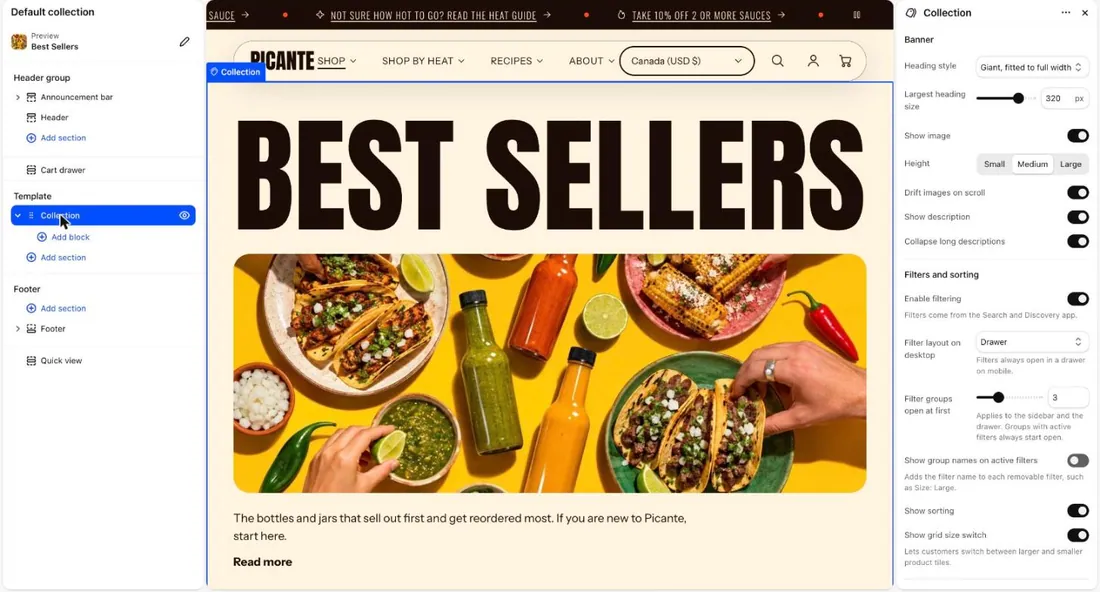
The Collection section on the collection page. Marker 1 is the section in the list. Marker 2 is the banner settings. Marker 3 is the filters and sorting settings.
  1. Under Filters and sorting (marker 3), switch Enable filtering on or off. Filters help shoppers narrow the products, for example by size.
  2. Next to Filter layout on desktop, choose Drawer, Sidebar or Horizontal bar.
  3. Switch Show sorting on to let shoppers sort the products.
  4. Switch Show grid size switch on to let shoppers pick bigger or smaller tiles.
  5. Select Save.

Use a second template when some products need a different layout, such as gift sets.

  1. Select the page picker, then Products.
  2. Select Create template (marker 3) and follow the prompts.
The list of product templates in the page picker. Marker 1 is the Default product template. Marker 2 is the other product templates: accessory, bundle and pantry. Marker 3 is Create template.
The list of product templates in the page picker. Marker 1 is the Default product template. Marker 2 is the other product templates: bag, bundle, care, headwear and socks. Marker 3 is Create template.
The list of product templates in the page picker. Marker 1 is the Default product template. Marker 2 is the other product templates: accessory and bundle. Marker 3 is Create template.
  1. In your Shopify admin, open Products and select a product.
  2. Find Theme template and choose your new template.
  3. Select Save.
  • A layout change applies to every product that uses the same template.
  • Phones always show a swipeable gallery, whatever layout you pick.
  • Filters come from the Shopify Search & Discovery app. Install it to choose which filters appear.
  • On phones, filters always open in a drawer.

See every setting: Product page and Collection page.